He wanted to do some cat themed cards for our family members with cats, so I used My Scrap Chick's Cat's Life set, and Peachy Keen Stamps' Critter Faces. I thought they turned out really cute. Again, he picked out all of the papers and patterns, the faces, embellishments, stamps, etc. The inside of all three are the same, so, again, one picture is sufficient!
These are the last of the cards, so thanks for visiting, and I am letting him read all of your comments, so thank you!
A space to display my handmade cards and crafts!
Showing posts with label My Scrap Chick. Show all posts
Thursday, December 16, 2010
Friday, December 3, 2010
My first ever pop-up card!
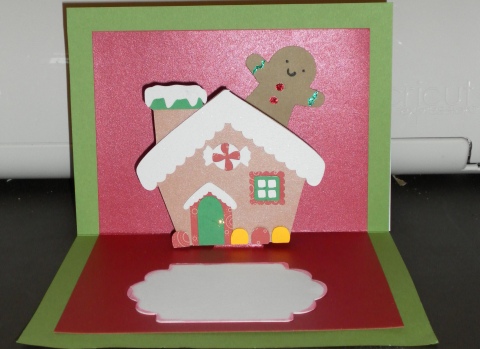
And boy, did I fall in love with this technique. It was so easy with the tutorial from Split Coast Stampers site, and this was created by my 7 year-old nephew Noah. Here's the story: a couple of weeks ago, he came to me and said, "Aunt Kim, I was wondering if maybe one day we could spend time together and you could help me make Christmas cards with your machine for everyone in the family." WELL, how cute is that?? He quickly ran off all of the themes he wanted, and my mind started going. Once he said gingerbread house for one, I knew it was time to try a pop-up card.
For this, I used a MTC and a My Scrap Chick set called North Pole, and it is so adorable! I did use Jolly Holidays for the gingerbread man, simply because it was a simple cut. I added a few stickles to him, pop dotted some elements of the house. and did the pop-up portion of the card. My nephew did everything else. he picked out all of the colors, the papers, the layout, the ribbon, and the saying! He wanted me to write inside, "Run, run as fast as you can, you can't catch me, I'm the gingerbread man." So that is exactly what I wrote, and you should have seen his face when it was all done. Well, actually, you can see it below! Lol. Of course, I wasin charge of the Cricut and the glue, but I was so impressed with what he came up with. Sunday we are doing a few more, so stay tuned. Thanks for visiting today!
Friday, October 8, 2010
Cupcake shape card
This is another simple and quick one that I threw together for the craft fair en masse. I used a file from My Scrap Chick for this, and I omitted the heart from the front, for simplicity. I used the Divine Swirls on the icing portion, and squeezed out some stickles for the sprinkles or jimmies, depending upon where you live in the country. We Jersey people get made fun of for calling them jimmies, but oh well.
Anyway, back to the card, lol. I cut it so the finished card is 6"x4.9", and just stamped the inside with an SU stamp that says, "Wishing you the happiest birthday yet". Also, because it's for a craft fair, I made it in a rainbow of colors, as seen in the second picture.
Well, tomorrow is the craft fair from 9-4, so wish me luck everyone!!! I will post pics of my table all set up tomorrow evening, and let you all know how it went. Thanks for visiting!
Anyway, back to the card, lol. I cut it so the finished card is 6"x4.9", and just stamped the inside with an SU stamp that says, "Wishing you the happiest birthday yet". Also, because it's for a craft fair, I made it in a rainbow of colors, as seen in the second picture.
Well, tomorrow is the craft fair from 9-4, so wish me luck everyone!!! I will post pics of my table all set up tomorrow evening, and let you all know how it went. Thanks for visiting!
Saturday, August 28, 2010
Halloween Treat bag
I'm getting into full swing with Halloween and Christmas ideas, so it's likely you will see a lot of it over the next few months - my apologies to those who do not like these holidays. However, they are my two favorite holidays, and I love to decorate and make cards for both! This is a simple bag pattern from My Scrap Chick, and you can find it under the mini patterns as the treat bag trio. This is the first one I did, so it was more of a test than anything. I actually plan to pop dot the decorations, but here are the specs.
I cut it to a full 12x12 mat, which made it about 5" high. I used some cute double sided cardstock from Joann's, and it was a pattern included in the recent 5/$1 sale. WOO HOO!!! I plan on making a bunch for nieces, nephews, and students this year! The added embellishments are from a huge K&Co assortment pack, and I should have used pop dots, but since this was a test run, I didn't. I plan on filling with candy in a treat bag, and then tying the handles together with a cute Halloween ribbon. This was so simple, there really isn't anything else to say, so thanks for visiting today!
Friday, July 16, 2010
Day 6 - elephant!
Look how cute!!! I drew on the eyes because they were cut a bit too large, so I took a sharpie and drew them instead! I inked the edge of the tail just to give it some distinction from the back end! Thanks for checking in today!
Thursday, July 15, 2010
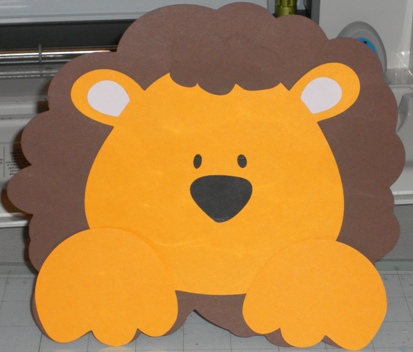
Day 5 - lion!
I love this little guy too!! My Scrap Chick does such great work! Despite the look of it in the back view picture, there are no lines in it. I think it is a reflection from the plastic on the cricut mat under it! Thanks for visiting again today!
Wednesday, July 14, 2010
Day 4 - tiger!!!
Well, I've made it no secret that I love tigers, soooo....I think so far he might be my favorite. What does everyone else think???
Tuesday, July 13, 2010
Day 3 - Hippo
I think this little one is pretty cute!! I used pink gems on the cheeks instead of plain cardstock, and everything else applies as with all other animal books. Therefore, to keep from being too redundant, I will just post the pics each day now. Thanks for checking in on day 3!!
Monday, July 12, 2010
Day 2 - monkey!
OK, Stacy, this one is for you! After I saw your comment on the giraffe, I had to make this guy day 2!!! Same specs as all of the animal books - My Scrap Chick files, pop dots on the feet and tail, cut at 6"x5.5". A little ink for the cheeks and sharpie for the eyes, and he was done! Hope you like him!
Sunday, July 11, 2010
Round 2 - Animal Book Week
Well, I think it's time for another animal book week. This time, it's the collection from My Scrap Chick called Zoo Animal Books, and I cut them all with Make the Cut. These seem to be even easier than the Sweet Animal Books I featured a couple of months ago, because she made use of negative space for the eyes, spots, etc. I love them! All links are included above, so just click away!
OK, without further ado, here is day 1, animal 1 - giraffe!! I think he is so cute! I cut him at 6"x5.5", and put a little ink on for his cheeks. Everything else was cut to proportion with the base. I also pop dotted the tail and hooves for some dimension. Very easy. As before, there are seven, so it works out perfectly for this entire week, while I put most of my craft time into the rest of the beach shape books I'm making! I can't believe we leave for vacation in less than a week!!!
Sunday, June 13, 2010
Shape card take 3.....
Yet another! This one is for my boyfriend's dad for Father's Day, it is another Friday Freebie from My Scrap Chick, and, as always, I love how easy her piecings are with MTC! For this one, I made it 5"x7", and used SU designer paper from the Brocade Background pack (on clearance here, by the way), and I think it went perfectly with this vest theme. I love how the top of the inside pattern shows through the front. But, I digress. Oh yeah, details....sooo, the pocket square was embossed with Divine Swirls, and the sentiment on the inside is from the Wild Card cart. The plain cardstock is just Recollections brand from Michael's, and this was so simple, I think that covers it! Thakns for visiting!
Friday, June 11, 2010
Flip flop shape card
I'm really having fun with shape cards right now - it's always nice to do something different for a while. Maybe this is what I need to break out of my slump, some more shape cards!
This one is from one of My Scrap Chick's Freebie Friday files, and I love how easily this cuts! I used paper from the K&Co Citronella pack, which I LOVE (I bought 3 of them), and I cut it at 6"H x 11"W !! I liked how the double sided pattern worked for this flip flop cut also, and notice how the flower she provided in the file almost matches the paper perfectly??? I inked the edge of the flower base, the top of the stamen, and the inside mat with the same color pink, and to finish it off, I hit the flower base with the CB Swiss dots folder. Super, super easy, and I think it would make a great invite for any summer picnic/pool party! What do you think? Thanks for visiting!
Saturday, May 22, 2010
OK, I'm on the bandwagon...
The latest trend seems to be the flower pot cards, so I decided to try one finally. I'm not entirely pleased about how it turned out, but I guess practice makes perfect. This card is a file from My Scrap Chick, and all the cuts but the leaves were done with that. I decided to cut some leaves from Lyrical Letters and use the CB divine swirls folder on it. Two of the flowers also has a CB folder used on them, and it was fresh flowers. At the top of the "pot" are two felt flowers, also. I felt like it needed a couple of extra flowers, so these went in well. The flower pot is made from a patterned paper from K&Co, and then scalloped part is from DCWV Rustic Stack. Thanks for visiting today!
Monday, May 17, 2010
New baby card
Here is one I did for a shower where the gender is unknown, so I tried to stick to mostly greens and yellows. The card base is from My Scrap Chick's 30 boxes and more collection (the card bases were the "and more"), and all cuts are from New Arrival. I just used MTC to join the title to the bottom of the card, cut out another title, and used the positive cuts from that second cut for the word inside the "blocks". I used CB swiss dots folder on the feet, cut at 2.5" x 1.75", and the onesies are cut at 1.7"x 1.5". All paper is from DCWV Boy Nursery and/or Nana's kids stacks, and the ribbons and gems are from Michael's. For anyone who may want the MTC file, I am more than happy to e-mail it to you, as I have already had one request. Thanks for visiting!
Sunday, April 11, 2010
Final animal book - MOUSE!
So this is it, the last in the series. I want to thank everyone for all of your comments and taking the time to visit my blog this week! This little guy did not turn out as well as I had wanted, nor did the pictures, due to the fact that I again had to use my cell phone. I still can't believe I broke my camera, but I have a funny feeling my boyfriend will be getting me a new one for my birthday in a couple of weeks! Just a feeling, but I will keep you posted! : )
Anyway, the mouse. That smudge on his face next to his whiskers is not an oops, it was something on my cell camera that I didn't notice until now. Oh well. For some reason, this little guy just looks off to me, but it's ok, he's still kind of cute. Again, you can get all of these files over at http://www.myscrapchick.com/, and this week I will be busy with several birthday cards, so stay tuned! Thanks for visiting, as always!
Saturday, April 10, 2010
Day 6 - LAMB!!
OK, well, I know I missed yesterday. Unfortunately, I broke my camera on Thursday night, and could not get a good enough picture with my cell phone yesterday, so I gave up. The lighting at work is pretty good, so I used my cell to take this picture today while I am sitting here bored. I'm still very unhappy that I broke my camera (I dropped it when a gust of wind took a bunch of items out of my hand, including the camera), but what's done is done.
For the lamb, I decided there was a lot of white here, so I needed to give him a little extra. Because of that, I decided to use the Bazzill Basics Swiss dot paper that I got from HSN a while back. I think it's better than palin white cardstock, what about you? All extra pieces were again pop dotted, and the pieces were all inked in black for dimension. Thanks for visiting, and I will get the last animal book up later today to close out the week!
Thursday, April 8, 2010
Day 5 - PUPPY!!!
Animal book week continues with the puppy cut. I am acutally giving this to my niece for her birthday next month, because her dog is brown with beige spots and ears! So this little guy was custom made for her.
Thank you for visiting today!
Anyway, he is a bit smaller than the others, although I doubt you can tell! I cut him at 5" x 4.5", and inked, pop dotted....well, you knwo the drill by now. I apologize for the blurry backside picture, but for some reason my camera did not want to take a clear shot of it!
On a side note, I am very unhappy with what is going on with PC and the lawsuit against the software that allows me to create some of my projects. PC needs to realize that they do NOT have on offer everything and every image that consumers want, so we look for programs that allow up more options and freedom. MTC has not replaced my cartridge purchasing habits - on the contrary, I just bought 4 new carts last week with the cricutmachine.com BOGO offer. Since I bought MTC, I have gone through more mats and blades than I care to think about, because I am using my machine SOO much more frequently. Anyway, that's just my two cents and venting on that topic!
Wednesday, April 7, 2010
Day 4 - BEAR!!
Ok so I actually got this put together just now, since we are waiting to take my mom to the doctor. This is the bear, obviously, and he was inked, pop dotted, anddrawn on as with the others. Again, you can get all of these files at http://www.myscrapchick.com/ in the mini patterns section.
If you look closely in the background of the open card picture, you can see my mom icing her splinted wrist!! At least she is in relatively good spirits about it all. The good news is her hip not only survivied the fall, but is actually doing better than expected, so it wasn't all bad!! Thank you all for your comments and prayers, and enjoy the bear! My boss told me to take the rest of the day off, so I should be able to do some cuts and finish my animal book series as planned! Thanks for visiting!
Tuesday, April 6, 2010
Day 3 - KITTY!!
One of my favorite cats I ever had was an orange male tabby, so I made this guy orange and white! I am making a gray and black one for my niece for her birthday, because this turned out so cute! I cut him at 5x5, and inked and pop dotted, as before. Again, the cut pattern is available at http://www.myscrapchick.com/ under mini patterns. Thanks for visiting!
Monday, April 5, 2010
Animal Book Series day 2 - DUCK!
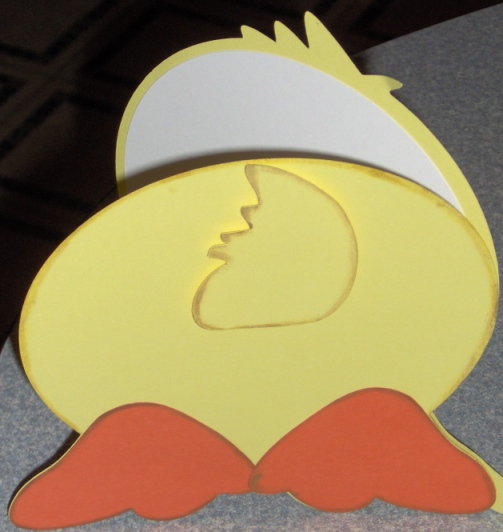
I love this little guy!! Once again, these files are available in a pattern at http://www.myscrapchick.com/ called Animal Books. This duck was cut a little larger, at about 6" x 6.5". Inking, drawing, and pop dotting all pretty much the same as the bunny. Thanks for visiting today, and I hope to see you again tomorrow for the Kitty!
Subscribe to:
Posts (Atom)