Here is a little pumpkin that my boyfriend and I drew faces on, lol. It was too small to carve, so I just got out the sharpie and away we went! Sorry the pictures are from the side, but the reflection from the flash was awful, unless I changed the angle of the lens. Oh well, you get the idea!
I hope everyone has fun trick or treating, if you are taking the kids, and take some time to watch part of one of the Halloween movies on AMC today! Have fun and be safe!
A space to display my handmade cards and crafts!
Sunday, October 31, 2010
Friday, October 29, 2010
Do you see what I see??
I just thought this was so cute! I know you can't tell, but there is a lot of dimension within the box itself. The hills are each staggered and pop dotted at different depths, with some inking for extra emphasis. The sheep are from Paper Doll Dress Up, and the font is Plantin, I think. The background paper is from Joann's, the star is from Joys of the Season, and the hills are just hand torn.
When I saw this picture, i realized that they needed something done with their ears (lol), so I put a piece of black behind each cut out so you couldn't see the stars through them. Oops!! Anyway, I thought it was a cute, simple message for the upcoming holiday season! Thanks for visiting today.
Tuesday, October 26, 2010
Wild Card ornament card
I added a ribbon to this after I took the picture, sorry! Anyway, this is from the Wild Card cartridge, and I cut it as a 5"x5" card. The paper is from the Eskimo Kisses line by Basic Grey, and I love it! I also added some silver glitter at the top to give it a more authentic look, haha, and I did a stamp on the inside from SU! Sorry, didn't take a picture of that for some reason (?). I'm really slacking! The Noel title is from Winter Woodland, and I welded it in the Gypsy.
These were pretty easy, and I was able to make 90 of them rather quickly! Yep, that's 90. ANyone want to buy some ornament cards??? LOL! Thanks for visiting today.
Sunday, October 24, 2010
So excited and honored!
My niece just asked me today if I would make her wedding invitations!!! I am so honored, and hope I can come up with exactly what she wants!
With that said, if anyone has ANY helpful advice, PLEASE feel free to let me know! I have never made an invitation, so any help is appreciated. Also, what are some good sites to get the envelopes with some color coordinated liners??? I have a feeling that will be the hardest part, finding those!
Friday, October 22, 2010
Snowman card
A little while ago, I saw a card on the Stampin' Up! website with a snowman theme that used these colors (certainly celery and baja breeze), and I immediately went to Barb's site and ordered 2 packs of each! I just loved the combo of these two colors, so I cut the snowman from Doodlecharms, used a Peachy Keen stamp for the face, cut tags from A Child's Year, and off I went!
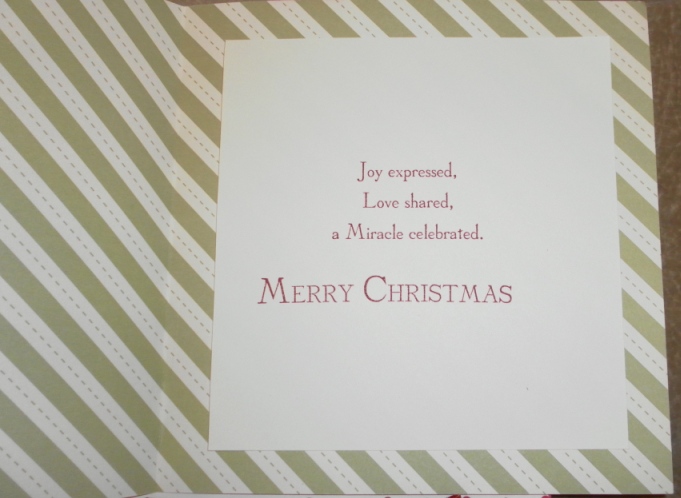
The sentiment on the tag is SU!, as is the wheel stamp across the baja breeze border piece. I ran the card through the Cuttlebug with the front of it inside the folder, and the back of it I kept plain. I felt the border piece needed just one more thing, so I went ahead and got my white jelly pen and made the dashed border on top and bottom. These were also for the card fair, so I kept them relatively simple in order to make multiples. Thanks for visiting today!
Thursday, October 21, 2010
Time for a flashback!!
This was one of the first four or five cards I ever made last year, so I decided it was time to post this one with Fall in full swing!
It's interesting to see your first couple of cards and how you did things, and think about how you've changed and grown. This seemed so pretty at the time, but looking at it now, it looks so simple! I still think it's pretty, but you can definitely tell it was one of my first attempts at cardmaking! From the heavy hand with the orange stickles, to the lack of embossing. I do have to say, at least I chalked the leaves to give them some dimension. Yay me! Also, the sentiment on the inside is something I found on the thread over at the Cricut MB with several pages of sentiments people had shared, so thank you everyone!!
So, if I remember correctly, all of the leaves are from Pooh and Friends, the acorns on the inside from Stretch your Imagination, and the Autumn title is from Wild Card. This was before my Gypsy, and even before my Design Studio purchase, so I have NO idea what sizes the leaves are. I basically remember hitting the size dial every cut to experiment. How far I've come since then!! LOL. Thanks for visiting today!
It's interesting to see your first couple of cards and how you did things, and think about how you've changed and grown. This seemed so pretty at the time, but looking at it now, it looks so simple! I still think it's pretty, but you can definitely tell it was one of my first attempts at cardmaking! From the heavy hand with the orange stickles, to the lack of embossing. I do have to say, at least I chalked the leaves to give them some dimension. Yay me! Also, the sentiment on the inside is something I found on the thread over at the Cricut MB with several pages of sentiments people had shared, so thank you everyone!!
So, if I remember correctly, all of the leaves are from Pooh and Friends, the acorns on the inside from Stretch your Imagination, and the Autumn title is from Wild Card. This was before my Gypsy, and even before my Design Studio purchase, so I have NO idea what sizes the leaves are. I basically remember hitting the size dial every cut to experiment. How far I've come since then!! LOL. Thanks for visiting today!
Wednesday, October 20, 2010
Simple "Joy to the World" cards
I used an entire pack of SU designer paper to make 24 of these 6x6 cards. These are just two of the designs, but they all worked well with this cute little word art SVG from SVGcuts.com! I used MTC to cut them, and it is a simple 2 piece pattern that was a breeze to reproduce quickly!
The inside sentiment is also Stampin' Up!, and the ribbons are from Michael's. Many of the cards I made for the craft fair are so simple and easy, that there isn't much to say about them! Thanks for visiting today.
Tuesday, October 19, 2010
"Thinking of you" cards
I think these are my favorites from the ones I made in the last few weeks. I especially like the yellow daisy one from the Sweet Stack. Same specs as most others - the mats are from DCWV Latte and Sweet stacks, stamp sentiment from Michael's, tags from ACY and Lacy Labels - and again, I kept them simple in order to make in many multiples. So, that's it for today, and thanks for visiting!
Sunday, October 17, 2010
Haunted house take 2!!
A couple of months back, I did a test run of the hautned house from Happy Hauntings, and I was pretty happy with the way it came out, but it was definitely a practice run. This time, I cut it all on the scale of a 12x12 mat, making the final product about 9" tall, so it's a much better size for decoration purposes. The one that I cut earlier was to the 12x24 scale, and it was just too cumbersome and bulky. This one is currently sitting on top of the speaker, which is on top of my boyfriend's entertainment center - he was SOOO happy about this...LOL!
For this one, I scaled all of the pieces in the Gypsy, and cut a couple of ghosts, trees, and spiderwebs from Happy Hauntings to go on it. I also used Core'dinations cardstock for the roof pieces, and sanded it to bring out the green. I then used a little bit of white ink on the railing pieces, just to give it a little bit of an old and weathered look. I also put a battery operated tea light inside of it, but obviously did not get a picture of it lit up right now. The windows are all vellum, so the light would show through nicely, and the trees are 4" and 5" tall. I may put something on/in the trees, but for right now, this is good enough. Thanks for visiting today!
Friday, October 15, 2010
Flower pot cards
I made 35 of these because they were so quick and easy! I used a file from My Scrap Chick, and cut them at an overall dimension of 6"x4". The scalloped edge is a pattern from DCWV Garden stack, and I felt like it went perfectly with a flower pot theme. I used the Swiss Dots folder on the flowers, and the Divine Swirls on the leaves for a little extra.
I left them blank inside because I feel like these can be used for any occasion, so I wanted to make them versatile. Thanks for visiting today!
Thursday, October 14, 2010
Baby cards
Today's post is a set of baby cards I made for the craft fair. I actually also made a green one for each set, but have no idea where that one went! Anyway, I used New Arrival for the onesie cuts, a really old stamp set for the lettering inside the blocks, and cardstock from Anna Griffin and DCWV.
I ran the onesies through the CB with Swiss dots, and on the inside, used an SU sentiment stamp for new baby. Thanks for visiting today!
Wednesday, October 13, 2010
Get well themed cards this time!
More on the same idea, just a different occasion. Same as before - overall card dimensions are 5x7, and the mats are from DCWV Latte and Sweet Stacks. Tags are from A Child's Year, and Lacy Labels. The sentiment is from a set at Michael's, as is the ribbon.
Sorry I didn;t say much, but I am feeling pretty crappy, so my energy and creativity are pretty low right now, lol. Thanks for visiting!
Tuesday, October 12, 2010
Congratulations cards
Same as the birthday cards in the last post, these were embellished with Lacy Labels and tags from ACY. In the blue and pink ones, I stamped an SU wedding sentiment, and on the darker striped one, I used a stamp that says, "Chase your dreams, you just may catch one." I thought it was nice and general for a congratulations card.
Also the same from yesterday are the mats with from the DCWV Sweet Stack and Latte stack. Thanks for visiting today!
Monday, October 11, 2010
One of the craft fair cards: birthday
I used two 4.5"x6.5" mat stacks - DCWV Sweet Treats and DCWV Latte stack - for the mats for these cards. It made them quick and easy, avoiding cutting a ton of rectangles! Lol. So, for the birthday cards, I used Lacy Labels for the sentiment frames, and for the Latte cards, I used A Child's Year for the tags. I kept the insides simple and quick with an SU stamp. The outside stamp is from a set at Michael's.
These are just three patterns of the five in the set. Basically what I did was take each mat stack, and pick several designs out of each to make cards around. I used 15 designs from the Sweet Stack, and 10 from the Latte stack, and tried to make some male themed, some female themed in each set. See how much thought I put into all of this?? Haha. I then grouped them by occasion, and divided them into sets of 5 cards. I will post the other occasions in the coming days. Thanks for visiting!
Saturday, October 9, 2010
Craft fair pictures
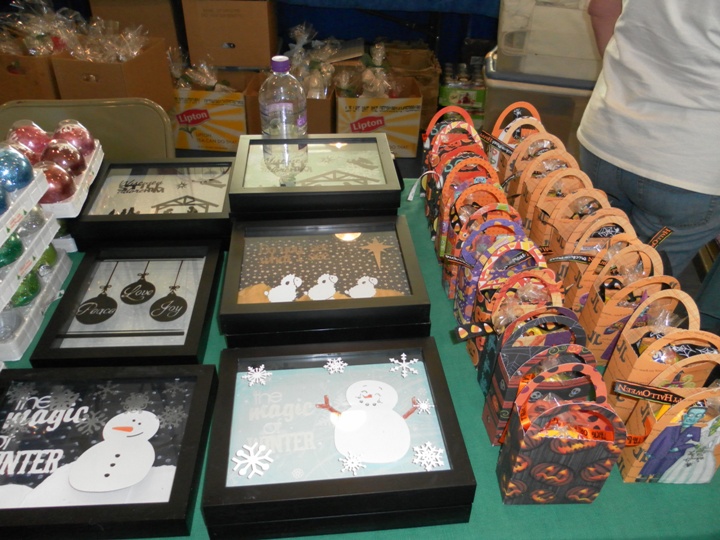
Well, it's over, thank goodness! I have been working tirelessly for a couple of months, to the point of neglecting my boyfriend, my poor cat, and the gym! So, here is what my table looked like at the beginning of the show:
I counted it up, and over the last 6 weeks, I made...wait for it......wait for it.....568 cards. No, that is not a misprint.....568 cards in a little over a month. So, that is what the table looked like before it opened. And I did not take a pic of it afterwards, because, well, it looked pretty much the same. : ( It was not a good day, and I am feeling pretty dejected right now. Soooo many people stopped to exclaim how beautiful my work was....but then they just walked on to the next table. I did sell over half of my Halloween treat bags, a few shadow boxes, and about 30 cards. But not ONE, not even ONE, ornament sold. I thought they turned out cute, but I guess not. That's what I get for thinking my work is OK.
So, I am taking a much needed break fromc rafting to gather myself and my pride. Thank you for visiting!!!
I counted it up, and over the last 6 weeks, I made...wait for it......wait for it.....568 cards. No, that is not a misprint.....568 cards in a little over a month. So, that is what the table looked like before it opened. And I did not take a pic of it afterwards, because, well, it looked pretty much the same. : ( It was not a good day, and I am feeling pretty dejected right now. Soooo many people stopped to exclaim how beautiful my work was....but then they just walked on to the next table. I did sell over half of my Halloween treat bags, a few shadow boxes, and about 30 cards. But not ONE, not even ONE, ornament sold. I thought they turned out cute, but I guess not. That's what I get for thinking my work is OK.
So, I am taking a much needed break fromc rafting to gather myself and my pride. Thank you for visiting!!!
Friday, October 8, 2010
Cupcake shape card
This is another simple and quick one that I threw together for the craft fair en masse. I used a file from My Scrap Chick for this, and I omitted the heart from the front, for simplicity. I used the Divine Swirls on the icing portion, and squeezed out some stickles for the sprinkles or jimmies, depending upon where you live in the country. We Jersey people get made fun of for calling them jimmies, but oh well.
Anyway, back to the card, lol. I cut it so the finished card is 6"x4.9", and just stamped the inside with an SU stamp that says, "Wishing you the happiest birthday yet". Also, because it's for a craft fair, I made it in a rainbow of colors, as seen in the second picture.
Well, tomorrow is the craft fair from 9-4, so wish me luck everyone!!! I will post pics of my table all set up tomorrow evening, and let you all know how it went. Thanks for visiting!
Anyway, back to the card, lol. I cut it so the finished card is 6"x4.9", and just stamped the inside with an SU stamp that says, "Wishing you the happiest birthday yet". Also, because it's for a craft fair, I made it in a rainbow of colors, as seen in the second picture.
Well, tomorrow is the craft fair from 9-4, so wish me luck everyone!!! I will post pics of my table all set up tomorrow evening, and let you all know how it went. Thanks for visiting!
Thursday, October 7, 2010
More Christmas cards....
Are you bored yet?? LOL! I saw a similar idea on the messageboard a while back, and changed it up a bit. These are some really simple ones I did using A Child's Year and an Anna Griffin stack from last year. I did 35 total, and the sentiment stickers are from Michael's.
The inside is done with an SU! stamp, and an EK Success edge punch. I made these 6x6 just to keep it simple and make it easier on myself by cutting the 12x12 paper in half. The silhouettes are cut at 3.5" tall each, just to leave room for the ribbon and tag. More to come...I'm almost done now. I have 2 more days to put on finishing touches, and then it's Saturday. Thanks for visiting today!
Tuesday, October 5, 2010
Still working, BUT........
....I HAD to take some time out from my craft fair making to hit up the newly added Stampin' Up! Clearance blitz. OH MY!!!!! Barb over at SnowmanLover sent me a heads up, and thank goodness!! I was looking the other day at Michael's, and could not believe how expensive the small, lesser quality ink pads are. SU has many of the old colors for $2.99 each, and all of the old retired cardstock packs are on there now too. So if the color renovation left your favorites out in the cold, GO HERE!!!! Seriously, I got a TON of stuff for dirt cheap. Have fun!
Sunday, October 3, 2010
World Card Making Day efforts
As many of you know, yesterday was World Cardmaking Day! So, I decided to take it to heart this year, since I was not even making cards yet at this time last year, and really put my all into the "holiday". Therefore, I wanted to share with you much of the reason I have been hit or miss with posting lately. I am still getting everything ready for the craft fair, which is now less than a week away - eek! So next Saturday will be the end of the crazy cardmaking, and I can get back to a nice, leisurely pace. Here are two pictures of all of the cards I worked on yesterday. As you can see, most of them are in various stages of completion - some still need ribbon, some I ran out of the border I cut, some need senitments - but here is everything I did yesterday. Of course, each card/set will get its own post eventually with pics and details, but I wanted to give you an overview for now. Hope you enjoy....and boy, am I tired. So, it's off to enjoy my three year anniversary with my boyfriend, which is today!!! He has been sick as a DOG all week, so what are the odds that he actually planned ahead and I am getting my present today??? LOL! Not good, I'm afraid. Thanks for visiting today!
Friday, October 1, 2010
Cuttlebug cards
These were simple and easy for craft fair items! I just embossed with the Cuttlebug tree folder, inked the embossed area, matted it, and did some stamping inside. Call me crazy, but for some reason, I REALLY like how the non-traditional colors - the blue and lavender - came out here. I think it really looks nice.
So, I did 50 total, and it breaks down like this: 15 green, 5 lavender, 10 blue, 10 silver, and 10 gold. I am going to add ribbons to all of my cards in the last day or so before the fair next Saturday. Thanks for visiting!
Wednesday, September 29, 2010
Shadow boxes, again!
Almost done these, so bear with me! I made a total of ten shadow boxes tonight, in two different designs. here is the first, and all of the nativity cuts are from a file from Denise's Scrapbooking Room, where she generously provided the SVG for use in my MTC!! Thank you, Denise!
The phrase is from Winter Frolic, and I felt like it went perfectly with this design idea. I did five of these, with two different background papers, both shown in these pictures. I will post the other design tomorrow. Thanks for visiting today!
Monday, September 27, 2010
Candy cane cards
More cards for the craft fair made! This is just a sample, because I actually raided one of my old DCWV Christmas stacks, and made 30 of these 6x6 square cards, so there are a bunch of cute patterns with these. The candy cane is from Christmas Cheer, and the ribbon is from Michael's.
The inside and outside sentiments are SU stamps, and the stockings are a stamp from Michael's dollar bin last year. I thought it went well in there! Well, since these were so simple, that's about all. Thanks for visiting today!
Friday, September 24, 2010
Sixty more cards tonight!
These turned out nicely, or so I think! I used all SU stamps, and paper from scrapbook.com. The inks are from the dollar bin at Michael's, and the riboon is also from Michael's. I just cut the 12x12 sheets in half to make 6x6 square cards - wow, is that easy! I ended up making 60 total, 30 of each color. Just more I'm trying to sell at my craft fair in a couple of weeks! Thanks for visiting!
Thursday, September 23, 2010
More craft fair items!
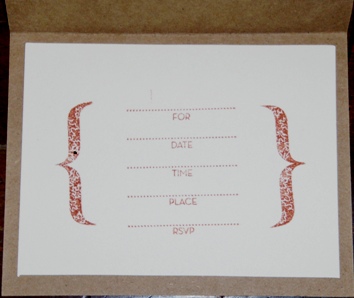
This was inspired by the make and take from an SU open house I went to a couple of weeks ago (see post below). I used a few clear stamps by Inkadinkadoo from Michael's (leaves and "Happy Thanksgiving), the SU invitation stamp and Give Thanks, kraft paper from Joann's, ribbon from Wal-Mart, and ink pad from SU - Cajun Craze. What I am doing is selling them in sets, and then just including the insert. It is not glued in yet, because I am going to make it versatile enough for them to choose whether they want to buy a Thanksgiving invitation or simply a Thanksgiving card - brilliant, huh?? LOL!
This is a standard A2, to make it easier to create multiples. I made a total of 60 of these tonight! Lots of work, but hopefully worth it. I ahve been working my tail off for this craft fair, although it isn't showing up on my blog yet! It will, I promise! Thanks for visiting!
Wednesday, September 22, 2010
Another shadow box
This one is the snowman from Doodlecharms, cut at 5" tall. I hand tore some white DCWV glitter paper and pop dotted the middle protion to give it the 3D effect, as well as pop dotting the snowman with double the dimension of the snow "drift". I know this picture isn't the best, but I had to use my cell phone camera, since my regular camera is currently 50 miles away at my boyfriend's. OOPS!
Anyway, I also etched snowflakes onto the front of the glass - can you see them? The title is from Winter Woodland, and for the blue background, I just used a Q-tip and dabbed it ont the ink pad, then the paper in random fashion. So, what does everyone think??
Friday, September 17, 2010
Shadow box
First, I apologize for my posts being so spotty recently, but I have been CRAZY busy trying to make items and cards for the craft fair I will be selling at in 3 weeks - YIKES! I ahve TONS of stuff cut, and now the putting together will begin soon! Here is one thing I got done last night, and it was so simple. I used black vinyl to make a design very similar to one I saw in an online decor catalog, so I got to work making my own! I used MTC and Chopin Script font for the wording on each ornament. Thankfully, the shapes were pretty basic, and I could replicate it rather easily. The paper inside the shadow box is from SEI Wintersong, which was from last year.
I could not really get a picture that came out well enough to give the full affect - it looks much nicer in person, rather than flat and uninteresting in this picture! But I think you get the idea. More to come, so thanks for stopping by today!
Monday, September 13, 2010
Some great ideas from these!
I went to an SU open house this past Saturday (why can't you live closer, Barb?!?!), and the hostess had these samples as make and takes. Of course, once I made them, the brain started working. Do I have these stamp sets? No. Can I afford to buy them right now? Not really. But, the design did give me some good ideas for other cards, and I am really happy for that! So, off to make some cards for the craft fair I am going to try to sell at next month. Hope you like these, and that they inspire you, too!
Friday, September 10, 2010
Finally, a new post!!
I made this card for a co-worker, whose father passed away four years ago today. Actually, her soccer team wanted to buy a card, but I offered to make it instead. I knew a sympthay card, per se, was not the way to go, so I wanted to more of a "thinking of you" theme, so I found this rub-on and designed it around that.
I used a rub-on I had from years ago, DCWV Rustic Stack, SU blush blossom, and MTC to make the buckle. I just took a tag shape, and added in the slots (rectangles made reeeeeally small), and put the ribbon through. The ribbon and stamps are all SU also, and I used the dollar ink spots from Michaels for the inking. I intentionally kept it really simple on the inside (very plain and no mat) because 40 girls need to sign this thing!
Overall, the card is 6x9, so I made it pretty big, too! Thanks for visiting today, and I am really going to try to get back into the swing of crafting. Getting home at 8:30 every night this week has not helped! Ugh....
I used a rub-on I had from years ago, DCWV Rustic Stack, SU blush blossom, and MTC to make the buckle. I just took a tag shape, and added in the slots (rectangles made reeeeeally small), and put the ribbon through. The ribbon and stamps are all SU also, and I used the dollar ink spots from Michaels for the inking. I intentionally kept it really simple on the inside (very plain and no mat) because 40 girls need to sign this thing!
Overall, the card is 6x9, so I made it pretty big, too! Thanks for visiting today, and I am really going to try to get back into the swing of crafting. Getting home at 8:30 every night this week has not helped! Ugh....
Wednesday, September 8, 2010
Some fall sprucing up!
I have been ready for fall for a couple of weeks now, which is unlike me. Normally I want to squeeze every last second I can out of the summer, but this year with the record heat and early return to work, I have been SOOO ready for fall. So I knew as soon as Labor Day was over, my blog was getting a fall facelift! I hope you all like the new look, and I promise to get something posted in a day or two!!!
Monday, September 6, 2010
Blog award!!
Thank you, THANK YOU Stacy over at Love that Bug for presenting me with this adorable award!!! It is just such a cute one - and makes me want a cupcake! But I digress, lol....
I really appreciate it anytime someone gives me an award, and I wish I could give it right back to her! So, here are the rules for this award. 1. Thank the person who gave it to you (check!), 2. Copy the award to your blog (check!), 3. List 3 things you love about yourself, 4. Post a picture you love, and 5. Send the award to five blogs you love.
Ok, so 1 and 2 are done, now to number 3. Hmm, let's see. A. I love that I have green eyes that turn almost clear after a day in the sun (freaks out my mom every time!). B. I love that I am now an animal rescuer (lol!), and C. I love that I am so close to all of my family, especially my mom.
Time for number 4.
This is from our formal event for our Master's program a couple of years ago.
And finally, number 5, passing it along to five blogs I love! They are, in no particular order:
1. Barb, at Snowmanlover's Paperie
2. Melissa at Melissa's Scrappin Place
3. Lori at Scrappin' My Stress Away
4. Jin at Under a Cherry Tree
5. Amber at Staying Crafty
If any of you are drooling over the new Cricut Imagine, and have SCAL or MTC, you MUST go visit Jin at Under a Cherry Tree - no seriously! Just go over and take a look!! ; )
Well, I think I've covered it all, so that is about it for now! I am still busy making cuts for Christmas and Halloween projects, and will start posting them soon! Thanks again, Stacy for this award!
Friday, September 3, 2010
More 3-D obsession!!!
LOL, ok here is yet another 3D project! This was courtesy of a generous SCAL user, who posted this SVG for others' use!! Head on over to see her at http://www.cheekymagpie.com/?p=58. Isn't that an adorable website name also??
Anyway, I cut this at 4.5"x6", so it is pretty large. I used SU designer paper, and a dimensional sticker from Michael's to give it an added touch, and I am trying to think about how to use this! As of right now, I am thinking of trying to make it into a gift card holder somehow. Oh well, I'll figure it out, and I will let you know when I do!
Again, thank you to CheekyMagpie for the posting of this file, and to the fellow MTC user who found it and shared it - such a great crafting community! Thanks for visiting today.
Anyway, I cut this at 4.5"x6", so it is pretty large. I used SU designer paper, and a dimensional sticker from Michael's to give it an added touch, and I am trying to think about how to use this! As of right now, I am thinking of trying to make it into a gift card holder somehow. Oh well, I'll figure it out, and I will let you know when I do!
Again, thank you to CheekyMagpie for the posting of this file, and to the fellow MTC user who found it and shared it - such a great crafting community! Thanks for visiting today.
Thursday, September 2, 2010
Busy, busy!
Well, I realized I haven't posted a for a couple of days, and I feel badly about that, so how about a little story?? The reason for my absence is that, over the last few days, most of my time has been put into getting the new kitty integrated into the house after the vet visit, de-fleaing, etc. Remember her from an earlier post this summer???
The cat who has had eminent domain thus far (lol) was not entirely happy, but he wasn't too bad either. He watched her very closely, hissed when she got too close, watched her slink away, and he was OK.
So, our vet visit with her was interesting. The vet knows the breeder from where she wandered and he called the woman. Turns out, Tigger and several other of her breeding cats escaped during the first East Coast blizzard in late January, and she managed to survive the rest of that brutal winter, and come up to our house in June. She was the only one who never went home, so the woman said we could keep her, since she was going to retire her from breeding anyway! Apparently, she does not keep them as pets, and when they are retired, she simply adopts them out. So, with all that said, most of my time has been going into getting her comfortable and adjusted, and my crafts have been neglected. I am making cuts for craft fair projects, though, so I will be plenty busy soon! Thanks for hanging in there with me!
The cat who has had eminent domain thus far (lol) was not entirely happy, but he wasn't too bad either. He watched her very closely, hissed when she got too close, watched her slink away, and he was OK.
So, our vet visit with her was interesting. The vet knows the breeder from where she wandered and he called the woman. Turns out, Tigger and several other of her breeding cats escaped during the first East Coast blizzard in late January, and she managed to survive the rest of that brutal winter, and come up to our house in June. She was the only one who never went home, so the woman said we could keep her, since she was going to retire her from breeding anyway! Apparently, she does not keep them as pets, and when they are retired, she simply adopts them out. So, with all that said, most of my time has been going into getting her comfortable and adjusted, and my crafts have been neglected. I am making cuts for craft fair projects, though, so I will be plenty busy soon! Thanks for hanging in there with me!
Subscribe to:
Posts (Atom)